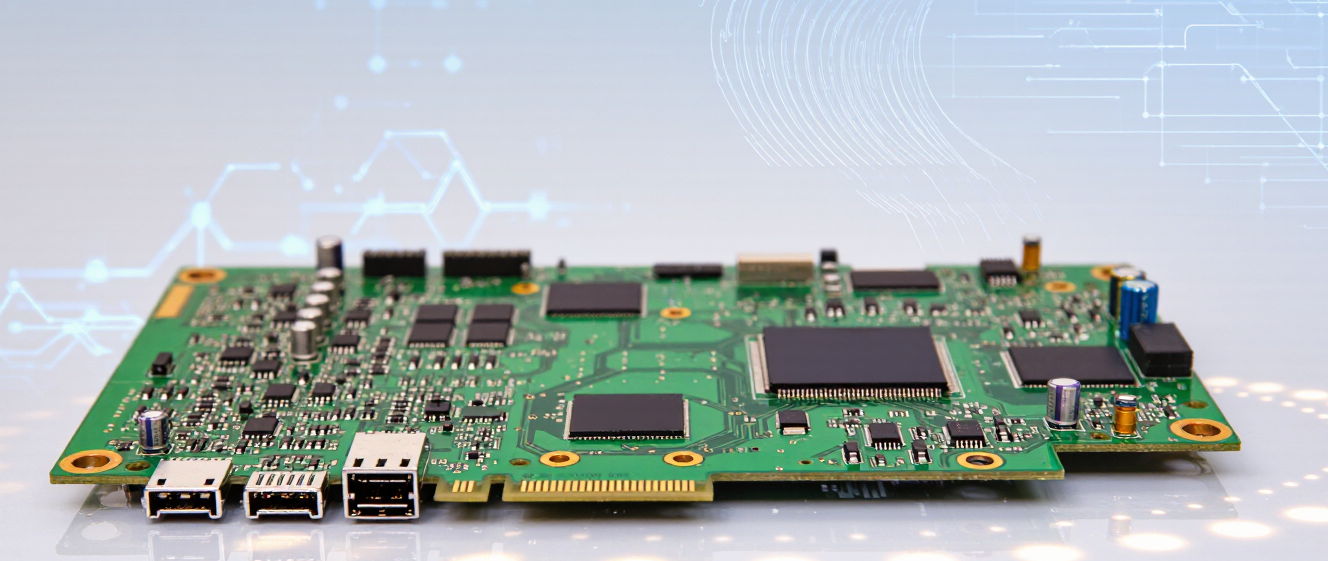
Ever wonder how PCBs are actually made? A raw look behind the circuit board curtain
So You're Curious About How These Little Boards Come Together?
PCB manufacturing process and machines – sounds technical, right? Well, stick around because I'm gonna walk you through what actually happens behind those factory doors.
At first, I wasn't sure either. You grab your electronics from the store, turn them on, and boom – they work. But have you ever peeled open an old device and stared at that green (or black, or blue) board full of copper traces and tiny chips? Yeah, me too. And suddenly you start wondering: how does anyone even put this stuff together without breaking everything?
Step One: It All Starts With Bare Copper
Picture yourself holding a sheet of fiberglass covered with just plain copper. That's where everything begins. Not fancy, not complicated – just a thin layer of metal sitting there waiting for something brilliant to happen.
This part might surprise you. There's no cutting around here. Instead, they use big rolls of this copper-clad material. Machines feed it through, and honestly? It looks pretty intimidating if you've never seen industrial equipment up close. Giant rollers, heated tables, all kinds of lights flashing. My jaw actually dropped the first time I visited a facility.
Now We're Getting Into The Actual Printing
This is probably the weirdest step, which I find kind of cool. They print circuits onto these copper sheets using photolithography. Sounds like sci-fi, I know, but it's basically using light to transfer patterns onto special material that becomes your circuit paths.
Here's where pcb manufacturing machines really show off their worth. Those lasers and exposure units? Expensive pieces of equipment that most of us will never own. But without them, none of our phones or computers would exist.
I remember asking an engineer why they don't just draw these out by hand. His response was simple: "Try drawing a million lines under a microscope." Yeah, thought that one through quickly.
The Etching Part (Where The Magic Actually Happens)
Okay, now we're getting into the chemical stuff. If you're allergic to reading about acids, maybe take a bathroom break now.
They dunk these exposed boards into vats of chemicals that eat away copper. Except – and this is key – the parts that have been protected by that photo-resist stay behind. What you're left with are those intricate copper pathways that actually carry electricity through your devices.
There's something satisfying about this part, somehow. It's like sculpture but instead of chipping stone, you're removing what you don't need to reveal what matters.
Finally, Stuff Gets Plugged In
This is where regular people finally recognize something familiar. Resistors, capacitors, microchips – all those little components that get soldered onto the board.
Honestly, seeing machines place tiny electronic parts faster than I could blink was weirdly mesmerizing. Some factories have robots doing this work while humans monitor the process. Others still use older methods depending on what they're building and how complex it gets.
It depends on the situation, as my dad used to say when explaining anything complicated. Turns out he was right about almost everything.
What Should We Take Away From All This?
Maybe nothing concrete. Maybe just appreciating that next time you pick up your phone or turn on a laptop, there's a whole story happening inside those circuit boards we casually throw around.
The pcb manufacturing process isn't magic – it's engineering, chemistry, precision work, and sometimes pure luck that things don't go wrong. And the machines? They cost more than most houses, but they keep our modern world running smooth.
Either way, it's fascinating. And now you know something you didn't yesterday. Which, for a Tuesday afternoon read, isn't half bad, right?
So You've Wondered How Those Circuits Are Born?
I remember staring at a random circuit board once—just admiring all those tiny copper lines and wondering, wow, someone had to make ALL of that. Turns out, it's way more than just printing ink on cardboard.
When we talk about the pcb manufacturing process and machines, we're really talking about a dance of precision equipment that costs more than most cars. But let's be real—who cares about price when it's making the device that controls everything from your phone to your car?
The Drill That Makes It All Happen
Okay, so before we dive into the money pits, let's start simple. The drilling machine is pretty straightforward—you'd think it's just poking holes, right? Nah. These things drill holes down to fractions of a millimeter, and each one needs to align perfectly.
At first, I wasn't sure how these machines worked until I saw them up close. They use diamond-tipped bits spinning at insane speeds. One mistake and bam—whole batch wasted. No wonder those machines don't come cheap.
Etching: The Chemical Artist
Here's where things get interesting. The etching step uses chemicals to eat away the unwanted copper, leaving only what you want. It's kind of like sculpture—but with acid instead of chisels.
These aren't your average mixing bowls either. The machinery has to control temperature, chemical concentration, and flow rates with ridiculous precision. If you mess up the timing, your entire design could turn into mush. I mean, literally.
The Lamination Press: Stacking Like It Matters
Now we're talking big stuff. The lamination press stacks multiple layers together, compresses them under heat and pressure, and somehow doesn't melt everything. It sounds crazy but it works.
These presses can weigh several tons. Some of them cost over $500K. And yeah, I'm serious. They're built like tanks because if the pressure isn't even across the whole board, you'll have weak spots that fail later.
Why Everything Comes With a Price Tag
Okay, hear me out on this. These aren't mass-market gadgets. They're custom-built industrial beasts made for factories producing thousands of boards daily. The R&D alone eats up millions.
Think about it—if your phone dies mid-call because a PCB failed, nobody asks who's responsible except the warranty guys. So manufacturers build marginally better quality, which means bigger budgets for equipment.
A Few Last Thoughts Before We Wrap Up
Honestly, I never thought about this much until recently. But now every time I see a circuit board, I imagine those big machines doing their thing. It's pretty wild when you put it all together.
If you're ever curious about the pcb manufacturing process and machines, there's no harm in digging deeper. Knowledge doesn't hurt—and maybe next time you hold a device, you'll appreciate the work behind it a little more.
So, What Exactly Is a PCB Anyway?
PCBs, or Printed Circuit Boards, are basically the backbone of all our electronics. But here's the thing—most of us never really think about how they're actually made. You know when you see that green board inside your computer or phone and think "pretty cool," right? That's a PCB.
The First Thing Nobody Talks About
When I first started learning about pcb manufacturing process and machines, I was surprised by how many steps there actually were. It's not just throwing some metal on plastic. There's serious precision involved. Like, if you mess up during lamination, you might end up with traces that don't connect properly—and then good luck troubleshooting that later.
Step-by-Step Through the Process
Here's where it gets interesting. The whole journey starts with a bare copper-clad substrate. From there, engineers design patterns using special software, then transfer those designs onto the board through photolithography. This is where UV light comes into play—they expose specific areas to create the circuit pattern.
After etching happens (which removes unwanted copper), holes get drilled precisely where components will go. Those holes are then plated with copper so electricity can flow through different layers. Modern machines can drill holes smaller than a human hair honestly, at this point I'm kind of impressed.
Machines That Actually Do the Heavy Lifting
You'd be surprised by how automated everything's become now. Automated optical inspection systems check boards in milliseconds before any actual production moves forward. There are pick-and-place robots too—they can position thousands of tiny components per hour without getting tired or distracted.
| Stage | Key Equipment Used | Why It Matters |
|---|---|---|
| Lamination | Vacuum Press Machine | Creates strong bond between layers |
| E tching | Spray Etcher System | Removes unwanted copper precisely |
| Solder Mask Application | Sprayer & Curing Oven | Protects circuits from damage |
| Component Placement | Pick-and-Place Robot | Positions tiny parts accurately |
| Inspection | AOI Scanner | Finds defects before shipping |
The truth is, seeing real pcb manufacturing process and machines in action changes how you view your own devices. Those little chips aren't just plopped together randomly—they went through hundreds of precise operations to get where they belong.
Things Most People Overlook
At first, I wasn't sure if I should share some of these details, but here goes—quality control testing isn't just visual. They run electrical tests at multiple stages because catching issues early saves massive amounts of money down the line. One bad layer can ruin an entire batch of boards.
Also worth mentioning? Environmental considerations have become huge in recent years. Lead-free processes, water recycling systems, chemical waste treatment—all these factors matter more now. Good manufacturers invest heavily in sustainability because consumers are paying attention to these things.
Wrapping It Up Without Being Boring
Next time you pull apart an electronic device and spot that green board, you'll probably see it differently. There's artistry mixed with engineering in how each layer connects, each component finds its place, and every millimeter matters in the bigger picture.
It's not just about making something work—it's about making something that works consistently over years, sometimes decades. And that requires people who care about the details, plus machines that can execute with incredible precision.
So You're Starting Your First PCB Project?
Okay, real talk—I've been there. Bought all the fancy equipment, watched a million tutorials, ready to roll... and then absolutely everything went sideways within the first week. If you're diving into the pcb manufacturing process and machines, let me save you some pain points.
The Budget Trap (Yes, Even for Small Jobs)
First thing nobody warns you about? The costs add up faster than you'd think. When I started, I bought what looked like a complete starter kit for under $100. Spoiler alert: It wasn't. Turns out that budget machine needs specific consumables that cost more every month.
Skipping Proper Ventilation (Please Don't Skip This)
I learned this one the hard way. There's something intoxicating about working from your garage at 2 AM with just the headlights on. But etching chemicals don't care about your schedule. A proper fume extraction system isn't optional—trust me, your head will thank you later.
Assuming All Materials Are Created Equal
Different boards require different handling. FR-4 works great for most hobby stuff, but when you start doing higher frequency work or dealing with heat-sensitive components, you might be sorry you didn't upgrade sooner. It's not worth the savings if you have to redo everything.
Underestimating Time Buffers
Here's something that still surprises me—even after a couple years. What you see on YouTube in 20 minutes usually takes actual humans three hours. Every step has those weird moments where you're just staring at something, waiting, wondering why it's not cooperating.
Not Understanding the Full Manufacturing Flow
This one trips people up constantly. You can design a perfect board, print flawless patterns, but if you don't understand the actual pcb manufacturing process and machines involved, your final product might look nothing like your simulation. Layer alignment, copper thickness, solder mask application—all matter more than you think.
Overcomplicating Your First Projects
I wanted to make a custom controller for my gaming rig right away. Huge mistake. Start simple. Make single-layer boards. Learn the basics of drilling, then etching, then assembly. Building confidence matters way more than building complex circuitry early on.
My Biggest Lesson So Far?
Patience. Seriously. I spent so much time rushing through processes because I was impatient. Now I take breaks between major steps, document everything, and accept that some failures are just part of the learning curve. And honestly? That's okay.
Quick Checklist Before You Begin
-
Set up ventilation FIRST before bringing in chemicals
-
Start with pre-made test boards, not your own designs
-
Budget at least 30% extra for unexpected costs
-
Document EVERYTHING you do
Look, I'm not trying to discourage anyone from getting into this stuff—it's incredibly rewarding when it clicks. But going in with realistic expectations prevents so many headaches. Just try to learn slowly, keep notes, and remember that every expert once had their first disaster board sitting on their desk.
What's your experience been like? Drop any questions or horror stories in the comments—maybe we can all learn from each other's mistakes before they happen to us. 🙃